3D Models
Bringing 3D models into Sandbox offers significant advantages for a wide range of projects, from architectural visualization to engineering simulations. By importing custom 3D assets, users can create highly realistic and context-specific scenes that closely mirror real-world scenarios. This capability enables teams to visualize complex structures, test spatial arrangements, and communicate more effectively.
3D Models Library
This is the area where you manage your 3D models. The status of uploaded models is dynamically updated to keep you informed about the status of your uploaded model. Once an upload is finished, it will appear in the “Imported” folder inside Sandbox.
Accessing 3D Models
From the left-side Assets menu, left-click
3D Models. Please review the Asset Library Overview for information about viewing and managing assets in the Assets library.
Note
If a scene is currently running, exit Sandbox by pressing the
 icon located at the lower right corner.
Uploading 3D Assets
At the top right corner, left-click
the
 button. The upload dialog is now displayed: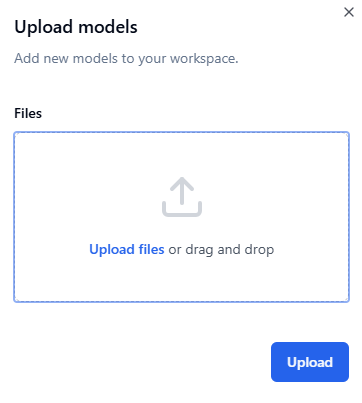
Drag and drop your file(s) onto the window, or click the
Upload fileslink to select your file(s) from your computer.Left-click
the
 button to start the upload.
Note
After an upload is complete, the model needs to be converted to a file format that Sandbox can use. Depending on the complexity of the model, this process can take some time.
3D Model Status
Once a model is uploaded, it will be listed at the top of the list of assets. Its status can be:
Status |
Description |
|---|---|
Processing |
The model is currently being processed by the model importer. |
Ready |
The model has finished processing and is ready for use. |
Failed |
There was a problem processing the file. Most likely there was a problem with the file. Please consult Export Scripts for information about preparing a 3D file. |
Supported File Formats
File format |
Notes |
|---|---|
FBX |
Supports colors and transparency. |
IFC |
Supports geo-referencing, colors and transparency. |
DWG/DFX |
Only 2D files supported. Unit must be set to millimeters. Must be exported to version prior to 2020. Scaling after import is not possible. DWG/DFX is currently experimental. |
OBJ |
Collision model only. Must be uploaded together with FBX model. FBX and OBJ files must have the same file name: 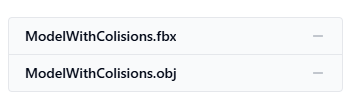
|
Filename Requirements
Only use lower case extensions in your files.
Special characters are not allowed in file names.
Reduce complexity of models to avoid creating performance issues.