Terrain Editor
The terrain editor can be used to add visual terrain changes to scenarios. These changes are non-destructive and only visible in the scenario where they are applied. Terrain edits are useful to modify the terrain for adding roads or models of buildings or other objects.
Accessing the Terrain Editor


Terrain Editor Nodes
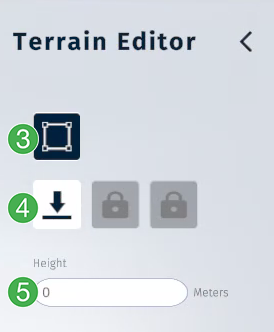
Terrain editor uses nodes that determine height, rotation, and size of an area.
Click the terrain node button to place a terrain node. Click on terrain to alter it.
Download the terrain node as a prefab (TBD)
Change the height of the selected node.
Terrain Editor Gizmo
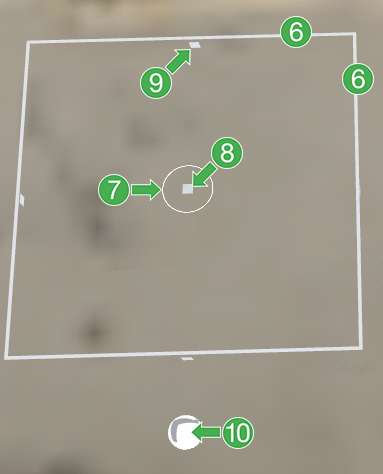
Border decides the area affected. Drag edges to change size.
Ring can be dragged to rotate the border.
Square can be dragged to move node horizontally.
Border square can be dragged to lower/heighten terrain.
Unselected node looks like a sphere. Click to edit.
Terrain Node Visibility and Removal
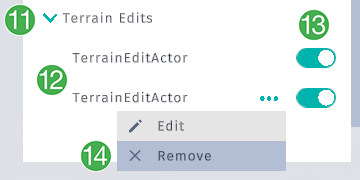
Terrain edits are listed in the Data View. Expand the
Terrain Editsnode to see all edits.List terrain edits
Toggle visibility to hide/display edits.
To remove an edit, turn off visibility, press
...to open the context menu and then selectRemove.
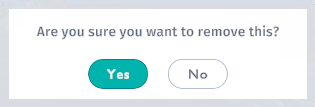
A warning will show before a terrain edit is removed. Press yes to confirm, no to cancel.